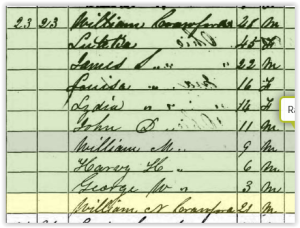
The results from recent DNA tests -- particularly the yDNA -- are pushing me to re-evaluate my CRAWFORD cluster research. Most of this research is pre-Internet and pre-Excel (remember AppleWorks and Microsoft Works?) However, I want to utilize the power of a spreadsheet to hopefully provide a fresh look at the data.
Thus, I turned to the Internet for ideas on how to proceed. I found the blog,
Cluster Genealogy Research, by Gus Marsh that provided background on the research process. This blog provided hints on where else to look for data for my cluster.
Looking around at what others have done, I found the blog post,
Timeline Template - How to Create a Timeline in Exel by Jon Wittwer. Not only does this blog offer a pre-packaged template for a reasonable price, it also includes the step-by-step instructions for the do-it-yourself-er. I would like to create this type of timeline -- especially for family reunion -- but I'm not sure it will work for my Cluster data.
Still on the lookout for spreadsheet ideas, I found DearMyrtle's post:
The Pinball Approach to Genealogical Research. The spreadsheet example in this blog grouped all individuals of the same name together. I really like the concept behind this type of organization and will likely employ it as I begin doing more research in 18th century Virginia.
My brief study of DearMyrtle's method led me to believe that it would separate out the different surnames when I needed to see them together. Thus, I went searching for more and came up with Ancestral Breezes,
Using Excel in Genealogy by Jen Baldwin.
After studying all of these excellent ways to use Excel to analyze the data, my next challenge was how to (quickly) get the data out of my genealogy program and into Excel so I could work with it. After looking at various report options, I opted to use the List titled: Timeline (Chronology) List.
Since I had already created named groups for the different aspects of my cluster, I was able to pull this data by the group. The place is an essential piece of information, so I clicked to include it but I turned sources off.
(I often have multiple sources for an event. Adding all of this data would have either created a very wide column or made the rows very tall. Either situation would have made it harder to work with the names, dates and places.)
The generated report appeared on the screen and could easily have been printed.
However, I wanted to get it into Excel versus sending it to a printer. Fortunately, I had the option of saving it as a text file.
Once saved, the file opened in Notepad.
Since that isn't what I wanted, I simply closed Notepad and opened Excel. After navigating to location of the file, I pulled down the down arrow next to All Excel Files so I could switch to All Files.
By switching to All Files, I could now see the text files along with the Excel files.
Since this data is in TXT format, I have to go thru the 'Text Import Wizard'. On the first window, I make sure DELIMITED is marked and simply click the NEXT button.
The Import Utility proposes the use of TAB as the DELIMITER. The screen allows one to preview the results so one could experiment with clicking both TAB and SPACE or COMMA to see the impact before actually clicking NEXT to import.
The next screen of the importer allows one to format the columns. Because I have dates over 2 centuries, I don't want to chance Excel misinterpreting them. Thus, I don't make any changes on this screen and click FINISH.
Since I wanted to get the year, given name, surname, county and state into separate columns I had to do some data manipulation. I used the TEXT FORMULA for RIGHT to pull the last 4 characters from the date column and put it in the YEAR column. I had to go back to Google research to figure out how to split the name and found Microsoft's
Split Text into Different Cells instructions.
Now I have the data in a format I can work with.


